Install Linux on Windows 10: A Step-by-Step Guide
In the world of operating systems, Windows 10 has dominated the PC landscape for years, but it’s not the only player in the game. Linux, with its vast array of distributions and open-source software, offers a compelling alternative. If you’re curious about Linux or need it for development or security purposes, you can install it alongside your Windows 10 system. This article will provide an in-depth guide, with step-by-step instructions, on how to install Linux on your Windows 10 computer.
Why Install Linux on Windows 10?
Before delving into the installation process, let’s explore why someone might want to install Linux on a Windows 10 machine.
- Exploration: Linux is renowned for its flexibility and open-source nature. Installing Linux allows you to explore a different computing environment, gain experience with a new set of tools, and understand the world of open-source software;
- Development: Many developers prefer Linux for its development-friendly features, terminal capabilities, and access to a vast software repository. By installing Linux on Windows 10, you can create a development environment that bridges both platforms;
- Security and Privacy: Linux is well-known for its robust security features and privacy-conscious design. Installing Linux can provide a secure environment for sensitive tasks or safeguard your privacy, making it an attractive option for security-conscious users.
Now, let’s dive into the detailed steps to install Linux on your Windows 10 machine:
Step 1: Choose a Linux Distribution
Linux offers a plethora of distributions (distros) to cater to different needs and preferences. Some popular choices include:
- Ubuntu: Known for its user-friendliness and extensive community support, Ubuntu stands out as a popular choice for both beginners and experienced users alike. Its straightforward installation process and compatibility with a wide range of hardware make it an appealing option. The vast repository of software and regular, reliable updates ensure users have access to the latest applications and security features;
- Fedora: Preferred by developers for its cutting-edge software and development tools, Fedora is at the forefront of technology, offering the latest versions of software and programming languages. Its commitment to free software and open source principles makes it a platform that supports innovation. The distribution benefits from the backing of Red Hat, ensuring a stable yet innovative user experience;
- Linux Mint: Prized for its user-friendly interface and stability, Linux Mint is a solid choice for those who prioritize ease of use and reliability in their computing experience. With a layout familiar to Windows users, it facilitates a smooth transition for those new to Linux. Its focus on out-of-the-box functionality means users can enjoy a comprehensive computing experience without needing to install additional software.
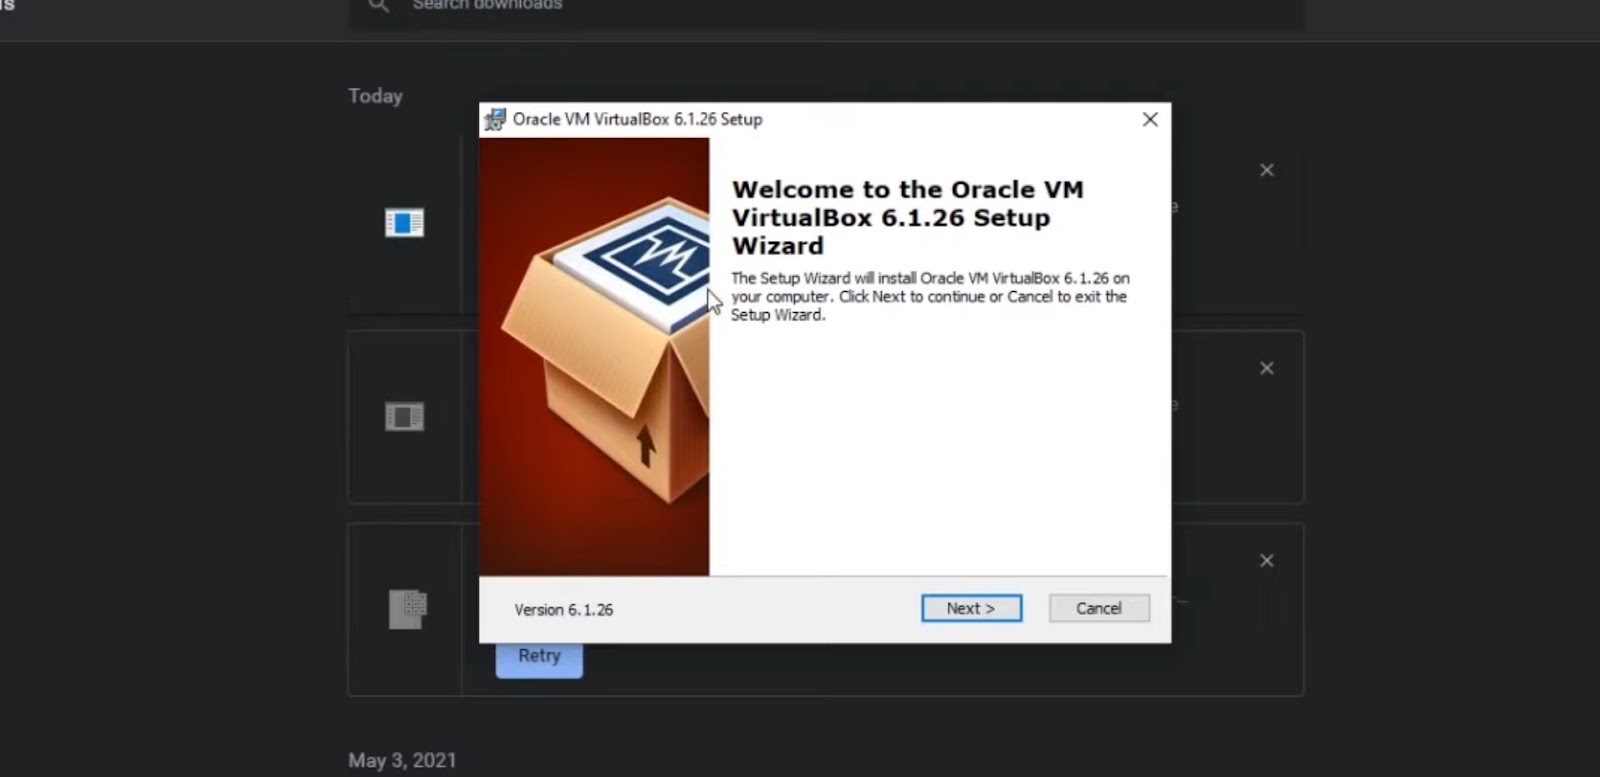
Visit the official website of your chosen distribution and download the ISO file.
Step 2: Create a Bootable USB Drive
To install Linux, you’ll need a bootable USB drive. Creating one is straightforward:
- Insert a USB drive (at least 4GB in size) into your computer. Ensure that any important data on the USB drive is backed up, as this process will erase all existing data on the drive. The USB should be detected automatically by your system. This step is crucial for creating a live USB that you can use to install or try out a new operating system;
- Download a tool like Rufus or Etcher, which allows you to create a bootable USB drive. These tools are user-friendly and support various operating systems, including Windows, Linux, and macOS. Their interfaces guide you through the process, making it straightforward to prepare your USB drive for booting;
- Run the tool, select the ISO file you downloaded earlier, and choose the USB drive as the target. These applications typically offer advanced settings, such as choosing the partition scheme and file system, but for most users, the default settings will suffice. The tool will then format the USB drive and write the ISO image onto it;
- Click “Start” or “Create” to create the bootable USB drive. The process may take several minutes, depending on the speed of your USB drive and the size of the ISO file. Once the process is completed, you will have a bootable USB drive ready. This drive can be used to install the operating system on a computer, troubleshoot, or run the OS directly from the USB without installation.
Step 3: Prepare Your Computer
Before proceeding with the installation, ensure that your Windows 10 system is up to date. Also, make sure you have enough free space on your hard drive for the Linux installation. It’s advisable to back up important data in case anything goes wrong during the process.
Step 4: Boot from the USB Drive
Now, it’s time to boot your computer from the bootable USB drive. Here’s how you can access your computer’s BIOS settings and set the USB drive as the boot device:
- Insert the bootable USB drive into your computer;
- Restart or power on your computer;
- During the boot-up process, pay attention to the on-screen instructions. You may need to press a specific key (e.g., F2, F12, Delete) to enter the BIOS or boot menu;
- Once in the BIOS or boot menu, navigate to the “Boot” or “Boot Order” section;
- Select the USB drive as the primary boot device and save your changes. This may involve using the arrow keys, Enter key, or other designated keys to navigate and make selections.
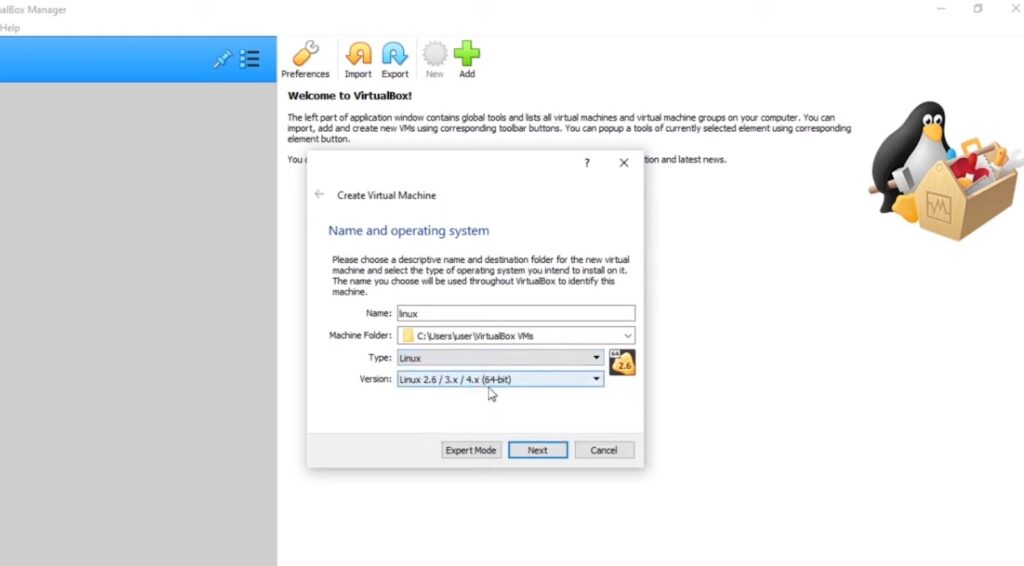
Step 5: Begin the Linux Installation
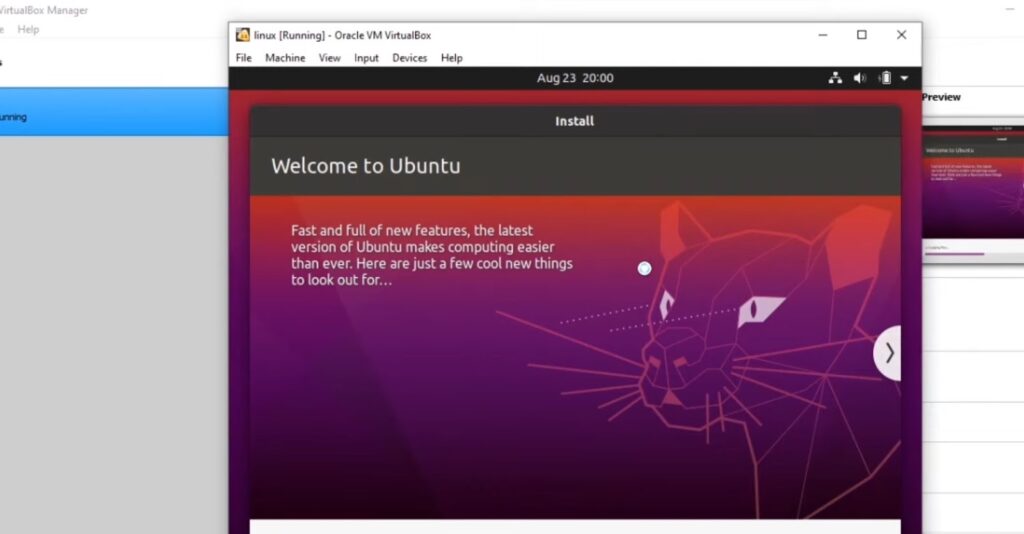
After successfully setting up your computer to boot from the USB drive, you’ll see the Linux distribution’s installation screen. Follow these steps to proceed:
- Select your preferred language;
- Choose your time zone and keyboard layout;
- Decide on the installation type:
- Install Alongside Windows: This option allows you to keep both Windows 10 and Linux on your computer. You’ll be able to choose which operating system to boot into every time you start your computer;
- Erase Disk and Install Linux: This option will replace Windows 10 entirely. Use this if you want to switch to Linux as your primary OS;
- Something Else: For advanced users who want to manually configure partitions.
- If you choose to install alongside Windows, you’ll need to allocate disk space for Linux. A slider or input field will allow you to specify how much space you want to allocate to each OS. Adjust it according to your needs;
- Set up your user account by providing a username and password;
- Follow the on-screen prompts to complete the installation.
Step 6: Complete the Installation
Once the installation is complete, the installer will prompt you to remove the bootable USB drive and press Enter. Do so, and your computer will restart. You’ll now see the GRUB (Grand Unified Bootloader) menu, allowing you to choose between Windows 10 and Linux when booting up.
Congratulations! You’ve successfully installed Linux alongside Windows 10. You can now log in to your Linux system and explore its features, applications, and endless customization options. Installing Linux on Windows 10 opens up a world of possibilities, whether you’re an enthusiast, developer, or privacy-conscious user. With a myriad of Linux distributions to choose from, you can find the perfect fit for your needs. This installation guide has walked you through the process step by step, from choosing a distribution to completing the installation.
As you embark on your Linux journey, remember that learning and exploring are key parts of the experience. Don’t hesitate to dive deeper into the Linux ecosystem, experiment with various software, and seek support from the vibrant Linux community. By installing Linux on your Windows 10 computer, you’ve taken the first step towards a more versatile and powerful computing experience. Enjoy the best of both worlds!