Mastering USB Installation of Linux
Linux stands as an adaptable and robust operating system renowned for its unwavering stability and extensive customization capabilities. Although it traditionally takes residence as the principal operating system on personal computers, the intriguing option exists to execute Linux directly from a USB drive. This innovative method proves exceptionally beneficial for various purposes, including evaluating different distributions, addressing technical issues, or establishing a transportable Linux ecosystem that can accompany you wherever you go. Within this informative manual, we shall gracefully navigate the intricate steps to deploy Linux onto a USB drive.
How to Install Linux on USB: Step 1: Choose and Download Your Preferred Linux Distribution
Embarking on your journey to harness the power of Linux? Fantastic! The first step is to choose the perfect Linux distribution for your needs. These distributions, often referred to as “distros,” come in various flavors, each tailored to different user preferences and requirements. Here’s how to get started:
- Explore Official Websites: Head over to the official website of the Linux distribution that piques your interest. Major Linux distros like Ubuntu, Fedora, and Debian maintain websites where you can find all the necessary information;
- Consider Your Needs: It distros offer diverse features, ranging from user-friendliness to robust customization options. Consider what you need from your operating system – is it for general use, gaming, development, or security? Your choice will influence which distro is best for you;
- Architecture Compatibility: Ensure you download the right ISO file for your computer. Check whether your system runs on a 32-bit or 64-bit architecture. Downloading the correct version ensures a seamless installation process.
Pro Tips:
- Research different Linux distributions and their characteristics to find the one that aligns with your goals;
- Look for user reviews or forums where individuals share their experiences with specific distros to gain insights.
How to Install Linux on USB: Step 2: Optional – Download a USB Flash Drive Formatting Tool
Before we dive into installing Linux on your USB drive, you might want to consider using a dedicated USB flash drive formatting tool for added convenience. Although your computer’s built-in formatting tool can do the job, these dedicated tools can simplify the process. Here are some options:
- Rufus (Windows): If you’re using Windows, Rufus is a popular choice. It’s user-friendly and efficient, making it an excellent tool for creating bootable USB drives;
- Etcher (macOS): For Mac users, Etcher is a reliable option. Its straightforward interface and compatibility with macOS make it an excellent choice for creating bootable Linux USB drives;
- GParted (Linux): If you’re already using Linux as your primary OS, GParted is a trusted tool. It provides comprehensive disk management capabilities, including formatting USB drives.
Pro Tips:
- Download the USB flash drive formatting tool that corresponds to your computer’s operating system for a hassle-free experience;
- These tools often come with helpful documentation and guides, so take a moment to read them for a smoother installation process.
How to Install Linux on USB: Step 3: Format the USB Drive
Now that you have your Linux distribution of choice and, if desired, a USB formatting tool, let’s move on to the next step: formatting the USB drive. This step ensures that your USB drive is prepared to receive the Linux installation.
- Insert USB Drive: Plug your USB drive into an available USB port on your computer. Make sure it’s the one you’re willing to use for the Linux installation;
- Dedicated Tool: If you opted for a dedicated formatting tool, open it, and you’ll typically find your USB drive listed as an option. Select it;
- Built-in Tool (Optional): If you prefer to use your computer’s built-in formatting tool, you can typically access it through your computer’s file explorer. Right-click on the USB drive and choose the “Format” option. Select either FAT32 or NTFS as the file system, depending on your preferences and compatibility with your Linux distribution.
Pro Tips:
- Ensure that you’ve backed up any important data from the USB drive before formatting it, as this process will erase all existing data;
- Double-check the file system compatibility with your chosen Linux distribution, as some distros have specific requirements.
How to Install Linux on USB: Step 4: Crafting a Bootable USB Drive for Your Linux Adventure
So, you’ve ventured into the world of Linux, and now it’s time to equip yourself with a bootable USB drive. This nifty tool will serve as your gateway to a new operating system experience. Follow these comprehensive steps to prepare your USB drive and load it with the Linux distribution ISO file you downloaded earlier:
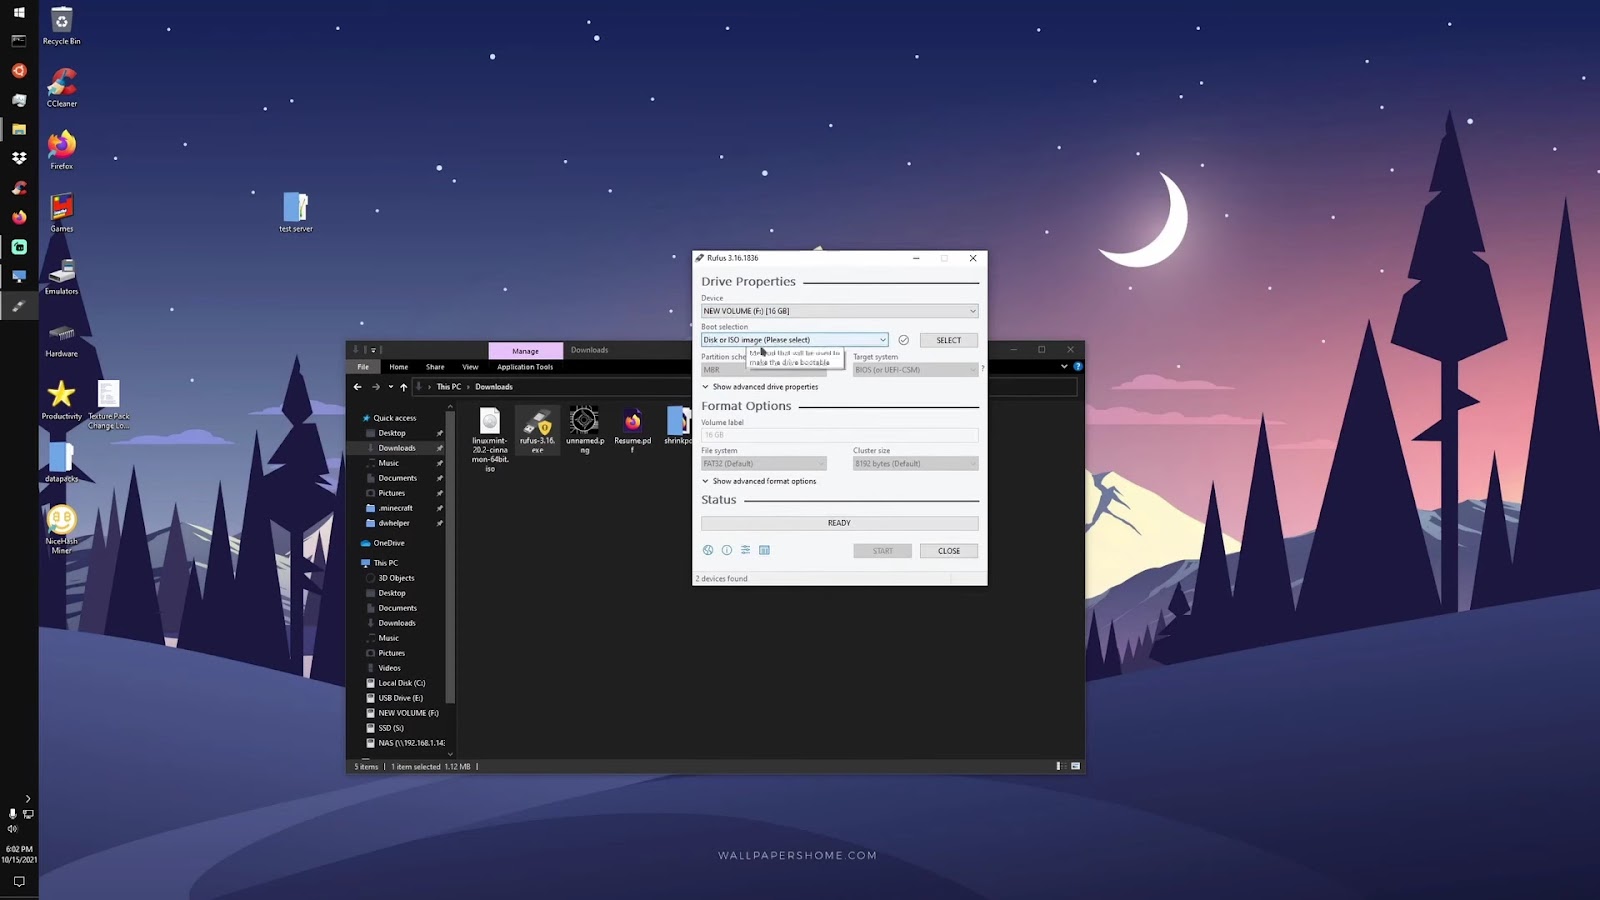
Using Rufus (Windows):
- Open Rufus: Fire up Rufus on your Windows machine, and you’re ready to begin your Linux journey;
- Select Your USB Drive: Ensure your USB drive is plugged in, and within Rufus, click on the “Select” button to choose your Linux ISO file;
- Partition Scheme: Now, pay attention to your computer’s architecture. If you’re dealing with a legacy BIOS or both BIOS and UEFI systems, opt for the “MBR” partition scheme. For UEFI-only systems, select “GPT.”;
- Create the Magic: With your USB drive selected and the partition scheme chosen, hit the “Start” button. Let Rufus work its magic, transforming your drive into a bootable Linux powerhouse.
Using Etcher (macOS):
- Embrace Etcher: macOS users, meet your ally, Etcher. Open the application and prepare to take the next step in your Linux journey;
- Choose Your Image: Click on “Select image” within Etcher to locate and load your Linux ISO file;
- Select Your USB Drive: Ensure your USB drive is connected and visible in Etcher. Click on it, as it’s about to become your trusty Linux companion;
- Initiate the Flash: With the image and drive selected, click the “Flash” button. Etcher will work its magic, transforming your USB drive into a powerful Linux bootable medium.
Using the dd Command (Linux/macOS):
Terminal Powers Activate: If you’re running Linux or macOS, you can harness the mighty ‘dd’ command to create your bootable USB drive.
- Open the Terminal: Launch your terminal, the gateway to your Linux adventure;
- Execute the Command: Type the following command, ensuring you replace “/path/to/linux.iso” with the actual path to your ISO file, and “/dev/sdX” with your USB drive’s identifier (triple-check to avoid accidents):
sudo dd if=/path/to/linux.iso of=/dev/sdX bs=4M status=progressThis command will perform the necessary magic to transform your USB drive into a Linux-ready warrior.
How to Install Linux on USB: Step 5: The Grand Booting Ceremony
Now that your USB drive is prepared with Linux, it’s time to usher in a new era for your computer. The process of booting from the USB drive may differ depending on your computer’s manufacturer and its BIOS/UEFI settings. Here’s a generalized guide to navigate this crucial step:
- Reboot Your Computer: Bid farewell to your current operating system temporarily. Reboot your computer to make way for Linux;
- Access the Boot Menu or BIOS/UEFI Settings: This is where the real magic happens. During startup, swiftly press the appropriate key, which could be F2, F12, Del, or another key depending on your computer. This will grant you access to the boot menu or BIOS/UEFI settings;
- Select the USB Drive: Within the boot menu or BIOS/UEFI settings, identify your USB drive. You can either choose it directly from the boot menu or configure the BIOS/UEFI to prioritize booting from the USB device.
How to Install Linux on USB: Step 6: Installing Linux on Your USB Drive
Congratulations on reaching Step 6! By now, you’ve successfully booted your computer from the USB drive, which is a significant milestone on your journey to creating a portable Linux powerhouse. Now, let’s delve into the installation process and ensure you make the most out of it.
Installation Process
Installing Linux on your USB drive is not as daunting as it may seem. It’s essentially like setting up a new operating system, but with the added benefit of portability. Here’s a detailed guide on how to proceed:
- Choose Your Linux Distribution: First, make sure you have chosen the Linux distribution you want to install on your USB drive. Different distributions offer various features, user interfaces, and purposes, so pick the one that aligns with your needs;
- Backup Important Data: Before diving into the installation, back up any essential data from your USB drive. This step ensures that your important files are safe, just in case;
- Plug in Your USB Drive: Ensure your USB drive is connected to your computer. It’s essential to select the correct device to prevent accidentally overwriting your computer’s internal hard drive;
- Follow On-Screen Instructions: Start the installation process by booting from the USB drive, and then follow the on-screen instructions provided by your chosen Linux distribution. These instructions will guide you through the installation settings, such as language, time zone, and keyboard layout;
- Select Installation Destination: At a crucial point in the installation process, you’ll be asked to specify the installation destination. Here, choose your USB drive as the target location. This step is pivotal to ensure Linux is installed on your portable drive rather than your computer’s internal storage.
- Partitioning: Depending on your Linux distribution, you may encounter partitioning options. For beginners, you can often choose the default partitioning scheme. Advanced users may opt for custom partitioning to fine-tune their setup;
- Install Grub (Boot Loader): When prompted, install the GRUB (Grand Unified Bootloader) or other boot loader to the USB drive. This allows you to select your desired operating system when booting your computer;
- Complete Installation: Continue following the prompts, and once the installation process is complete, your USB drive will be a functional Linux environment.
How to Install Linux on USB: Step 7: Configuring Your Portable Linux
Now that you’ve successfully installed Linux on your USB drive, it’s time to personalize and fine-tune your portable Linux environment to suit your preferences and needs. Here’s a comprehensive guide on how to configure your new Linux setup:
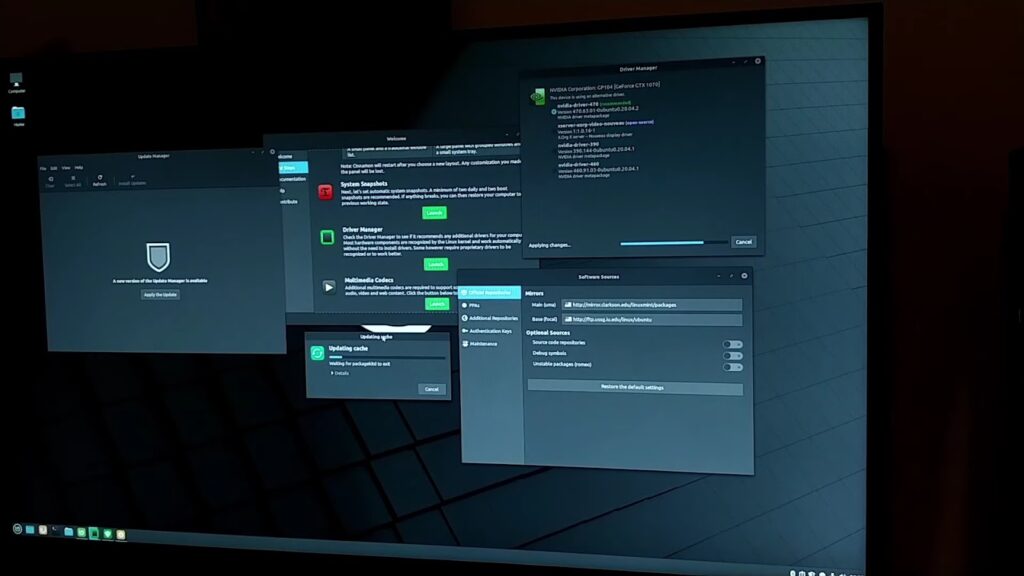
Customization and Optimization
- Install Applications: Begin by installing the applications you need. This could include web browsers, productivity tools, media players, or any software relevant to your usage;
- Update Software: Regularly update your Linux distribution and installed applications to keep them secure and up-to-date. You can use package managers like APT, YUM, or Pacman, depending on your chosen distribution;
- Set Up Preferences: Tailor your Linux desktop environment to your liking. Customize themes, wallpapers, and icons to create a visually appealing workspace;
- Configure User Accounts: If your portable Linux is meant for multiple users, create separate user accounts for each person. This ensures privacy and individualized settings for each user.
Performance Optimization
- Optimize Startup Programs: Disable unnecessary startup programs to ensure your portable Linux boots quickly and efficiently;
- Manage System Resources: Keep an eye on system resources using tools like “top” or “htop” and optimize resource usage for better performance;
- Backup Your Configuration: Regularly back up your customized settings and configurations to avoid losing your hard work in case of system issues.
Security Considerations
- Update Security Software: Install and configure security software such as firewalls and antivirus programs to protect your portable Linux from threats;
- Use Strong Passwords: Ensure that strong, unique passwords are set for your user accounts to enhance security;
- Encrypt Sensitive Data: If you store sensitive information on your USB drive, consider encrypting it to protect it from unauthorized access.
By following these detailed steps, you’ll have not only a functional portable Linux but also a personalized and optimized environment that caters to your specific needs. Enjoy the freedom of carrying your Linux system with you wherever you go! Read about the power of data science with our step-by-step guide on how to effortlessly install Anaconda on Linux systems.