Installing Kali Linux on VirtualBox Simplified
Kali Linux, known for its prowess in cybersecurity and ethical hacking, has gained immense popularity among enthusiasts and professionals. However, experimenting with Kali Linux on your primary system can be risky. The solution? Installing it on VirtualBox, a virtualization platform that provides a secure environment for testing and learning. In this comprehensive guide, we will walk you through the step-by-step process of installing Kali Linux on VirtualBox. Whether you’re a novice or an experienced user, this guide has got you covered.
How to Install Kali Linux on VirtualBox? Preparing for the Installation
Before we embark on the journey of setting up our virtual environment, it’s crucial to lay the groundwork properly. The process involves a couple of key steps that are essential to ensure a smooth and successful installation.
Firstly, the cornerstone of our setup is VirtualBox. This powerful, free, and open-source virtualization software is developed by Oracle. It allows users to run multiple operating systems on their host machine simultaneously, providing a versatile platform for testing, development, or simply exploring new operating systems. To get started, you will need to visit Oracle’s official website to download VirtualBox. It’s imperative to select the version of VirtualBox that is compatible with your host operating system. Whether you’re running Windows, macOS, Linux, or Solaris, there’s a version of VirtualBox tailored for your system. Ensure you’re downloading the software from a reliable source—preferably directly from Oracle—to avoid any security risks associated with third-party downloads.
Next up, acquiring the Kali Linux image is your second step. Kali Linux, renowned for its extensive testing tools, is a favorite among security professionals, ethical hackers, and IT specialists. To obtain the VirtualBox-ready image of Kali Linux, head straight to the official Kali Linux website. The website offers various images tailored to different types of users and systems. You’ll find options for 32-bit and 64-bit systems, so it’s critical to choose the one that matches your host machine’s architecture. Downloading the correct image ensures that Kali Linux will run optimally within VirtualBox, providing a seamless experience as you delve into its myriad of security tools and features.
These preparatory steps are not just routine but are foundational to ensuring that the installation process goes without a hitch. By downloading VirtualBox from Oracle’s official site and carefully selecting the appropriate Kali Linux image, you’re setting yourself up for a successful venture into the world of virtualization and cybersecurity exploration.
Installing VirtualBox
Now that you’ve acquired the essential files, it’s time to move forward with the installation of VirtualBox. This phase is crucial for setting up your virtual environment where Kali Linux will operate.
Running the Installer
After downloading, you’ll find the VirtualBox installer file in your download folder or wherever you chose to save it. This file is the gateway to launching VirtualBox on your system. Double-click on the installer to initiate the setup process. You will be greeted with a series of prompts and instructions displayed on your screen. These instructions are straightforward, guiding you through the various stages of the installation process. It’s important to read each step carefully and make any necessary selections that suit your setup preferences. Default settings are typically sufficient for most users, but feel free to customize the installation path or the components to be installed if you have specific requirements. Completing this step successfully installs VirtualBox on your host machine, paving the way for Kali Linux’s virtual environment.
Installing VirtualBox Extension Pack
The VirtualBox Extension Pack is a powerful add-on that enhances the functionality of VirtualBox. It introduces several advanced features, such as USB 2.0 and USB 3.0 support, VirtualBox Remote Desktop Protocol (VRDP) support, and disk encryption, among others. To install the Extension Pack, first, ensure that VirtualBox is already installed on your system. Then, visit the VirtualBox website to download the Extension Pack. The version of the Extension Pack must match the version of VirtualBox you’ve installed. Once downloaded, open VirtualBox, navigate to the “Preferences” menu, select the “Extensions” tab, and then click on the add new package icon. Locate and select the Extension Pack file you downloaded, and follow the prompts to install it. This step is not mandatory but highly recommended to fully leverage the capabilities of VirtualBox for a more robust virtualization experience.
Setting Up Kali Linux on VirtualBox: How to Install Kali Linux on VirtualBox?
With VirtualBox installed, it’s time to set up Kali Linux:
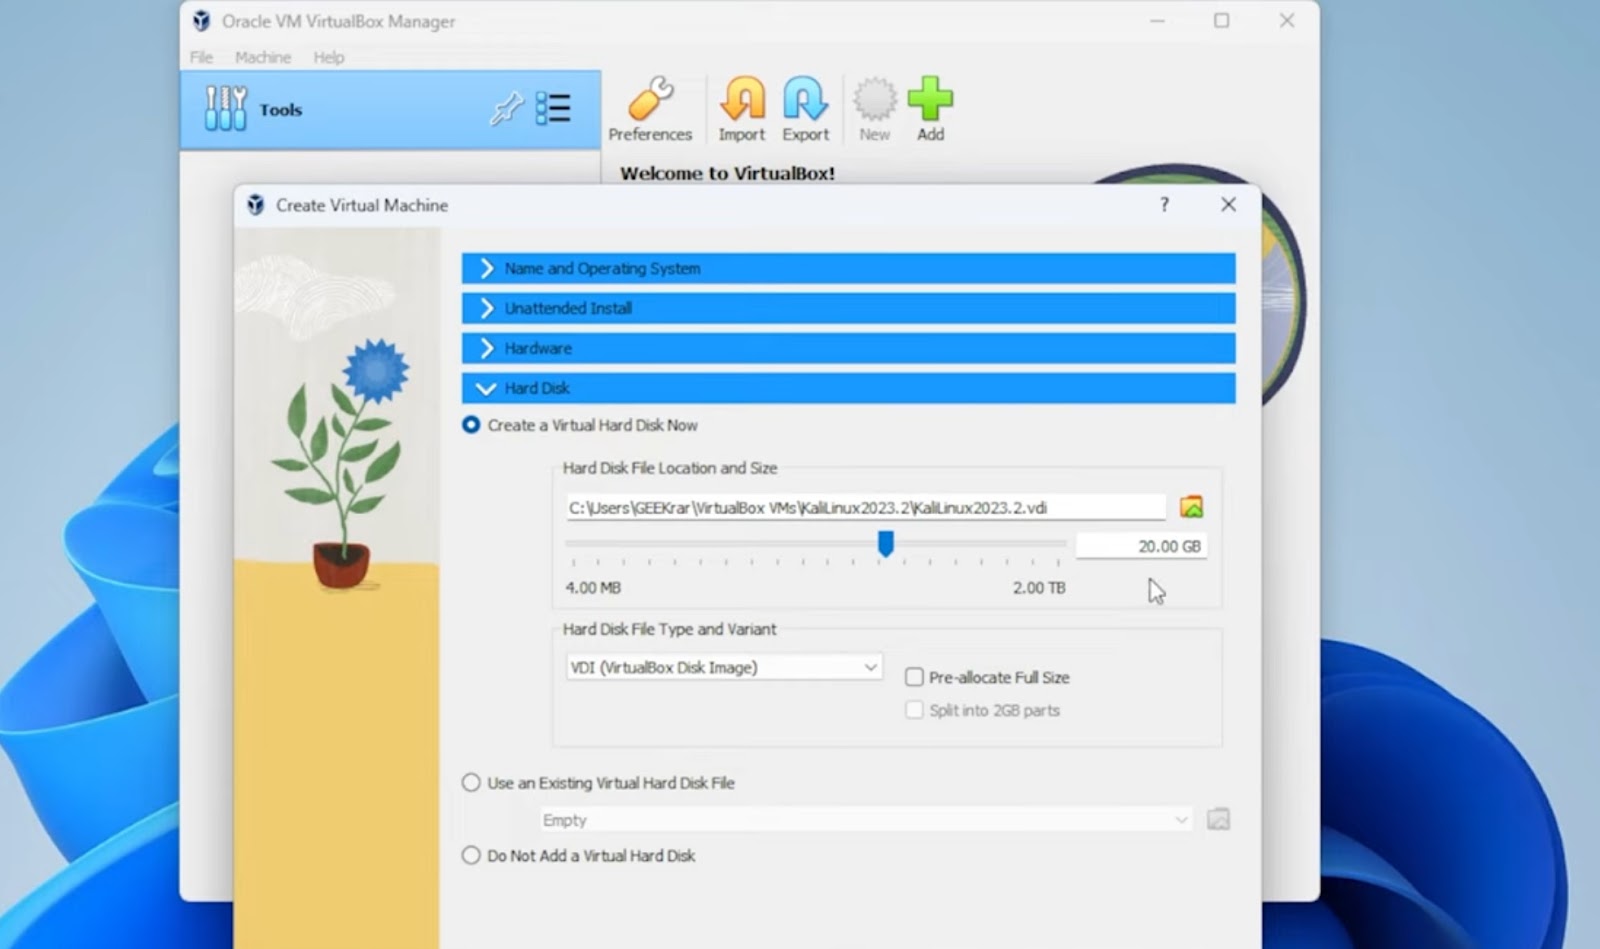
Creating a New Virtual Machine
Launch VirtualBox and click on “New” to create a new virtual machine. You will be prompted to enter a name for your VM, select the type (Linux), and choose the version (Debian 32-bit or 64-bit) based on your Kali Linux image.
Configuring Virtual Machine Settings
Before starting the VM, configure its settings. Allocate an appropriate amount of RAM (4GB is recommended) and specify the number of processors based on your system’s capabilities.
Adding the Kali Linux Image
In the “Storage” settings of your VM, attach the Kali Linux image you downloaded earlier. This is where the actual installation of Kali Linux will take place.
Additional Hardware Configuration
Depending on your preferences and system resources, you can configure additional hardware settings such as enabling 3D acceleration for better performance.
Installing Kali Linux
With the virtual machine configured, it’s time to install Kali Linux:
Launching the Virtual Machine
Start the virtual machine you just created. You will be greeted with the Kali Linux installation screen.
Beginning the Installation Process
Select the “Graphical Install” option to initiate the installation process. Follow the on-screen instructions, including selecting your language, region, and keyboard layout.
Disk Partitioning
During the installation, you’ll be prompted to partition the virtual disk. Choose the default “Guided – use entire disk” option for simplicity.
Post-Installation Steps
Setting the Root Password
Upon finalizing the installation of Kali Linux within your VirtualBox environment, an important security measure awaits—setting the root password. This step is critical as the root user possesses full administrative privileges, making the strength and security of this password paramount. To ensure maximum security, opt for a password that’s a complex combination of letters, numbers, and special characters, and avoid using easily guessable information like birthdays or common words. This robust password will be your key to managing and securing your Kali Linux system, safeguarding it from unauthorized access and ensuring that you have exclusive control over the administrative functions.
Updating Kali Linux
Before diving into the vast array of tools and features that Kali Linux offers, updating your system is essential. This ensures that all software is up to date, security vulnerabilities are patched, and you have access to the latest improvements and features. To update Kali Linux, launch the terminal application within the system. Once open, execute the following commands:

These commands will check for updates to the packages installed on your system and apply them. The `sudo apt update` command fetches the list of available updates, and `sudo apt upgrade` installs them. Adding `-y` at the end automates the process by automatically answering ‘yes’ to prompts. This step not only enhances the security of your system but also ensures that you’re working with the latest tools and functionalities that Kali Linux has to offer.
Exploring Kali Linux
With Kali Linux successfully installed on VirtualBox, you’re now ready to explore its vast array of cybersecurity and penetration testing tools. Whether you’re interested in ethical hacking, network security, or digital forensics, Kali Linux provides the tools you need to get started. So we’ve covered the entire process of installing Kali Linux on VirtualBox, from preparing your system to exploring the powerful tools it offers. By following these steps, you can create a secure and isolated environment for learning and practicing cybersecurity skills without risking your primary system. Kali Linux on VirtualBox is a valuable resource for both beginners and experienced professionals in the field of cybersecurity.