
How to Install Kali Linux on Android: A Step-by-Step Guide
Discover the power of Kali Linux, the go-to operating system for ethical hackers, right on your Android device. Follow this step-by-step guide to transform your smartphone into a hacking powerhouse with Kali Linux.
Kali Linux is a Debian-based distribution specifically designed for penetration testing, ethical hacking, and network security assessments. It’s a powerhouse packed with over 600 pre-installed penetration-testing programs. This guide will walk you through the intricate process of installing Kali Linux on your Android device, step-by-step.
While mastering the installation of software like Kali Linux on Android using our step-by-step guide, you can also delve into the world of Linux-based applications by learning how to install npm on Linux.
Why Choose Kali Linux for Android?
Kali Linux stands as a specialized Linux distribution, originating from the Debian family, and is meticulously crafted for the purpose of conducting digital forensics and penetration testing. Renowned for its robust suite of tools, it encompasses a comprehensive array of resources for those in the fields of ethical hacking and security investigation, boasting over 600 pre-installed programs dedicated to information security tasks. These tools cover a spectrum of activities essential for security auditing, from vulnerability analysis to network sniffing and beyond. In an exciting development for cybersecurity enthusiasts and professionals alike, Kali Linux has been adapted to function seamlessly on Android devices. This advancement transforms your smartphone or tablet into a highly versatile, mobile platform for network analysis and ethical hacking.
By installing Kali Linux on your Android device, you effectively carry a miniaturized, yet powerful digital forensics lab in your pocket, ready to deploy at a moment’s notice for on-the-go security assessments, penetration tests, and troubleshooting tasks. With Kali Linux on Android, you have the convenience of mobility paired with a formidable array of tools at your fingertips, enabling you to conduct comprehensive security audits and research, no matter where your professional or educational pursuits may take you.
Detailed Installation Guide
1. Requirements for Installation
Before diving into the installation process, it’s crucial to ensure that your device meets the following criteria:
- A rooted Android device (Root access is essential for the level of permissions required);
- At least 5GB of free storage space (Preferably more for additional tools and updates);
- A minimum of 2GB RAM for smooth operation;
- High-speed internet connection to download necessary files;
- Full charge on the device or a power source to prevent interruptions during installation.
2. How to Install F-Droid
Begin by downloading the F-Droid APK file from its official website and proceed with the installation.
3. Setting Up Termux on Your Android Device
Termux is a free, open-source app that simulates a Linux environment on Android smartphones, offering a terminal interface akin to Linux distributions. It allows users to run Linux commands and even full Linux distros without needing to root the device.
Here are the methods to install Termux:
Install Termux via F-Droid:
- After installing F-Droid, open the app, and use the search bar to find “Termux.”;
- F-Droid will list all related Termux applications. Choose the one named “Termux Terminal emulator with packages.”;
- On the app’s page, rather than selecting “INSTALL” immediately, scroll down and tap on “Versions” to view all available Termux versions. Install version 0.117 but avoid updating the app post-installation for optimal performance.
Install Termux directly from GitHub:
- Alternatively, download the Termux APK from the official GitHub page. It’s recommended to download version 0.118 from GitHub due to better stability compared to the same version on F-Droid;
- Navigate to the Termux GitHub page, find version 0.118 under “Releases,” and download the arm APK file;
- Once downloaded, install the app to start using Termux on your Android device.
Important Tips:
- Carefully follow the installation steps for each method to ensure a smooth setup of Kali Linux on your device later on;
- Pay attention to the version recommendations to avoid installation issues.
4. Installing Nethunter Kex for Desktop Interface Access
Nethunter Kex grants you access to the Kali Linux Desktop Interface on your Android device. You can download and install the application via the APK file from the Nethunter Store.
5. Downloading Hacker’s Keyboard
Follow the steps to install the Hacker’s Keyboard application by Klaus Weidner.
6. Activating Hacker’s Keyboard
The Hacker’s Keyboard offers enhanced functionality similar to a laptop’s keyboard, including Arrow, Tab, Ctrl, and Esc keys, along with multitouch support based on the AOSP Gingerbread soft keyboard. To enable it, open your phone’s Settings, navigate to “Manage Keyboard,” and activate the Hacker’s Keyboard as demonstrated.
7. Configuring Your System
Open Termux and update your system with the following command:
Note: Termux provides a command-line interface rather than a graphical user interface. This is standard for Linux systems, so if you’re familiar with Linux, it’ll feel right at home. If you’re new, simply follow these instructions to set up a full Kali Linux Desktop environment on your Android.
pkg update && pkg upgrade -y
By default, Termux has restricted filesystem access. To extend access, execute:
termux-setup-storage
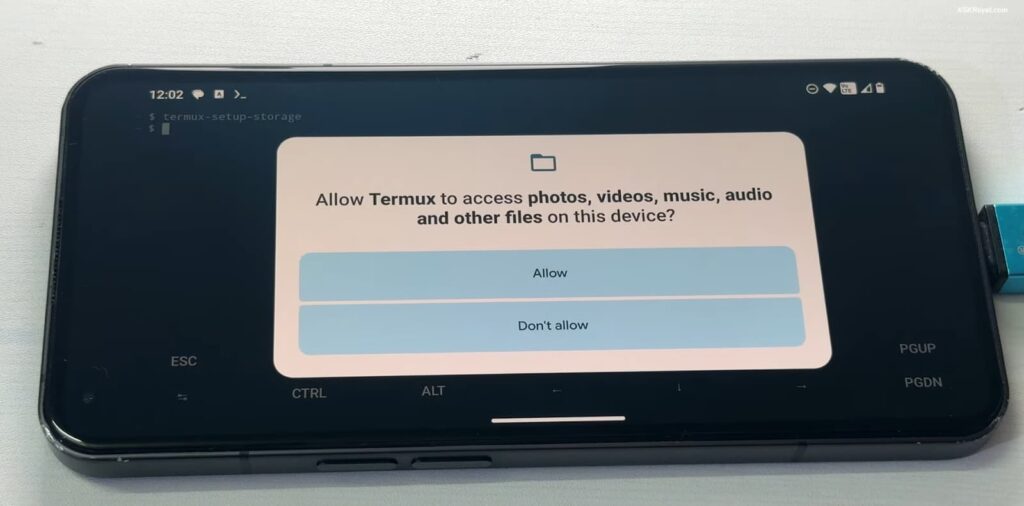
Approve the prompt to allow Termux to access photos, media, and files on your device. Then, prepare your system for Kali Linux installation on Android by installing necessary packages with the next steps provided.
8. Initiating Kali Installation on Android with the Installer Script
At this juncture, we’re equipped to proceed with the Kali Linux installation on our Android device. The initial step involves downloading the necessary installer script that facilitates the downloading of the Kali image file. Here’s how to go about it:
- Open Termux from your applications menu;
- Install the wget utility, which is essential for fetching the installer script from GitHub, by executing the command:
apt install wget
With wget installed, download the installer script from GitHub using the following command:
After the download, verify the presence of the ‘install-nethunter-termux’ file by running the ls command. To make this script executable, input:
chmod +x install-nethunter-termux
Execute the installer script by typing:
./install-nethunter-termux
This action brings up a screen adorned with the Kali logo, showcasing a selection of Kali images for installation, including:
- Nethunter ARM64 (full): A comprehensive Kali image brimming with an extensive toolkit for thorough penetration testing endeavors;
- Nethunter ARM64 (minimal): A pared-down version containing essential tools, optimized for devices with limited storage or for users preferring a lighter installation;
- Nethunter ARM64 (nano): A highly compact Kali image designed for specific, lightweight operational needs.
For a robust experience, we will opt for the Kali Nethunter (full) image. Though its size is considerable, it is packed with every tool necessary to embark on your penetration testing journey.
9. Activating Kali Linux on Your Android Device
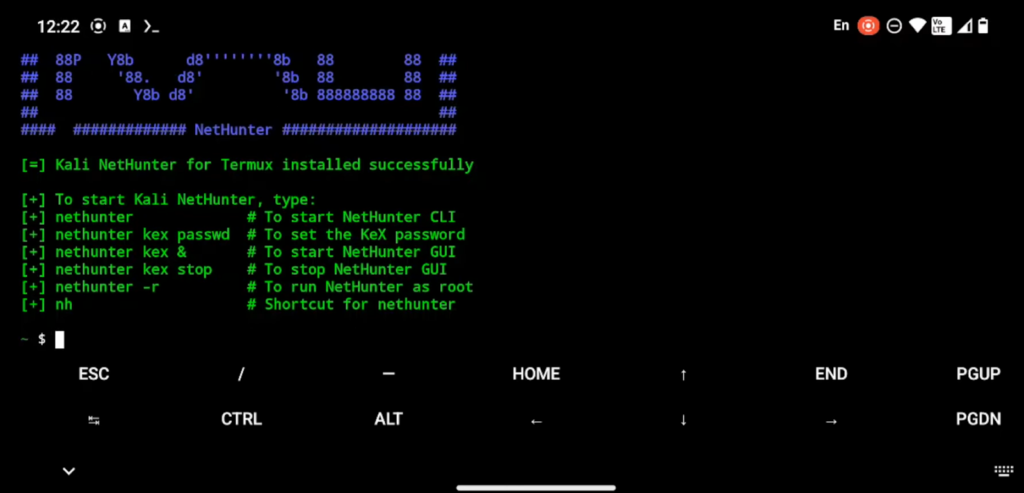
With Kali Linux now installed on your Android phone, you might observe that the Kali shell prompt isn’t immediately available. To access Kali, simply enter the following command and press Enter:
nethunter
This command transitions you to the Kali Linux console, mirroring the experience of operating a Kali Desktop on a laptop. To commence your exploration of Kali Linux tools and commands, begin by verifying the operating system and its version with:
cat /etc/os-release | grep “\bNAME=”
This sequence of steps ensures that you can utilize the powerful suite of Kali Linux tools directly from your Android device, emulating the functionality and experience of Kali on a traditional computing platform.
10. Activating the Kali Linux Desktop Environment on Android
So far, your interaction with Kali Linux on your Android device has been limited to command-line operations via Termux. However, there’s a seamless method to unlock and utilize the XFCE Desktop environment, which is the default graphical interface on Kali Linux. This is achieved through the use of Win-Kex, a utility designed to facilitate access to the Kali Desktop Interface for Kali Linux running on WSL (Windows Subsystem for Linux). Win-Kex operates by initiating a VNC (Virtual Network Computing) session within Kali Linux, allowing graphical access through a Kex-client utility, such as Nethunter-kex.
To begin, follow these instructions:
- Open Termux and input nethunter to access the Kali Linux shell prompt;
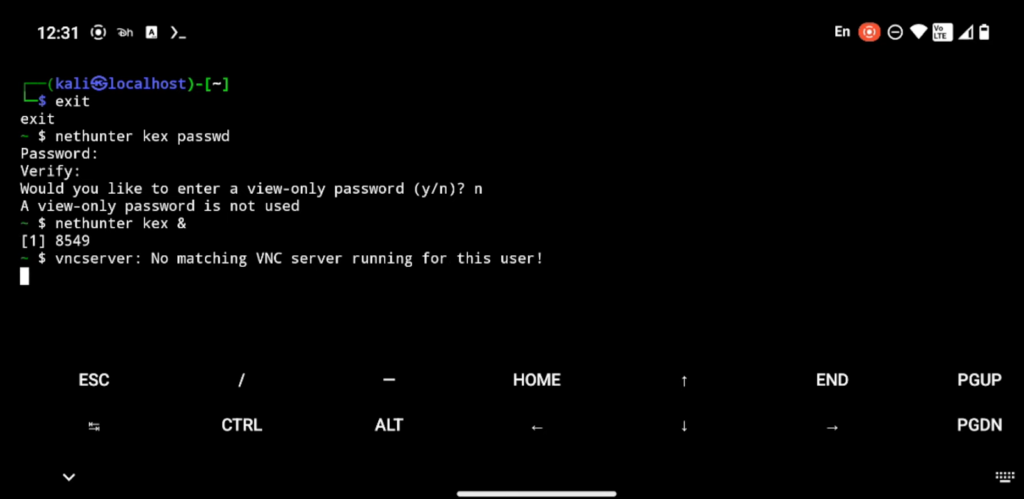
- Once in the Kali Linux console, enter kex and press Enter;
- You’ll be prompted to create a VNC password. Choose your password, confirm it, and remember that VNC passwords are limited to 8 characters. If you enter more, it will automatically be shortened to 8;
- Next, you’ll be asked if you want to set a “view-only” password. Enter ‘N’ for no and proceed by hitting Enter;
- Start the Kex session on your Android device with the command:
kex start
11. Establishing a Connection to Your Kali Linux Instance on Android
- Proceed by opening the Nethunter app and adjusting the settings as depicted in the provided illustration. Most configuration fields will auto-populate. Your only requirement is to input the previously set VNC password;
- After configuring, tap on “Connect” to initiate the Kali Desktop Environment on your smartphone in landscape orientation, as displayed.
Congratulations! You’ve successfully enabled a comprehensive Kali Linux operating system on your Android device. Maneuvering through the smaller menus might pose some challenge, yet the cursor and touchscreen functionality of your phone serve as an effective touchpad/mouse for navigation. To halt the VNC server, revert to the Termux app and execute:
This installation marks a significant milestone in converting your Android device into a portable hacking toolkit, equipped with considerable RAM and storage capabilities. It serves dual purposes: facilitating advanced tasks like password cracking and brute-forcing, all while maintaining the essential functions of a mobile phone. Although some tools requiring root access may not be operable on non-rooted devices, this limitation is minor, as many of Kali’s tools are accessible without root permissions.