Step-by-Step Guide: Installing AWS CLI on Linux
The AWS CLI is an essential tool for developers and sysadmin to automate and interact with AWS cloud services. It is an open-source tool built on the AWS SDL for Python. As a result, you no longer need to use AWS Management Console. Instead, you can use a Linux terminal and commands for managing AWS resources. Let us see how to install AWS CLI on Linux using the command-line options.
If you found this guide on how to install the AWS CLI on Linux helpful, you may also like the article about installing a Linux virtual machine on Windows 7.
Initiating AWS CLI Installation on Linux
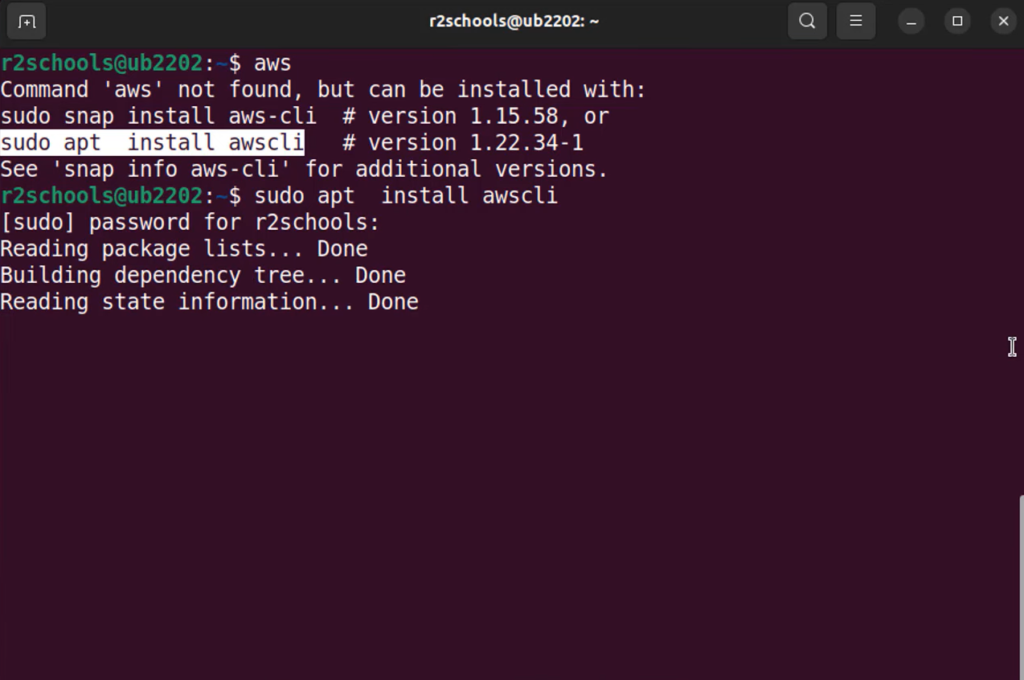
Begin by opening your terminal application. Depending on your specific Linux distribution, you’ll need to execute a particular command to install the AWS CLI toolkit. To install the most recent version of the AWS CLI, follow the pip installation method provided below.
| Linux Distribution | Installation Command |
|---|---|
| Debian/Ubuntu | sudo apt install awscli |
| Fedora | sudo dnf install awscli |
| RHEL/CentOS/Rocky/Alma Linux | sudo dnf install awscli (Ensure EPEL repo) |
| Alpine | apk add aws-cli |
| Arch Linux | sudo pacman -S aws-cli |
| OpenSUSE/SUSE Linux | sudo zypper in aws-cli |
To install AWS CLI version 1.x using the PIP generic method, run the following command:
python3 -m pip install awscli
If you prefer to install AWS CLI version 2, you can do so with these commands:
python3 -m pip install awscliv2
~/.local/bin/awscliv2 –install

Ensure that you include ~/.local/bin/ in your $PATH. Here’s an example of how to set up your $PATH on Linux:
# Step #1. Set PATH variable #
echo ‘export PATH=$PATH:~/.local/bin’ >>~/.bashrc
# Step #2. Set bash alias too #
echo ‘alias aws=”awsv2″‘ >>~/.bashrc
# Step #3. Use the source command to load changes #
source ~/.bashrc
After installation, you can check the AWS CLI version by running the following command:
aws –version
The output may vary depending on your package manager and Linux distribution. For example, here is the output from my Ubuntu 20.04 LTS developer workstation:
aws-cli/1.18.69 Python/3.8.10 Linux/5.13.0-35-generic botocore/1.16.19
Here are the outputs from version 2 (v2):
2.1.1
AWS CLI v2 command: /home/ubuntu/.awscliv2/binaries/aws
aws-cli/2.4.28 Python/3.8.8 Linux/5.13.0-37-generic exe/x86_64.ubuntu.22 prompt/off
To configure the AWS CLI with API access keys, follow these steps:
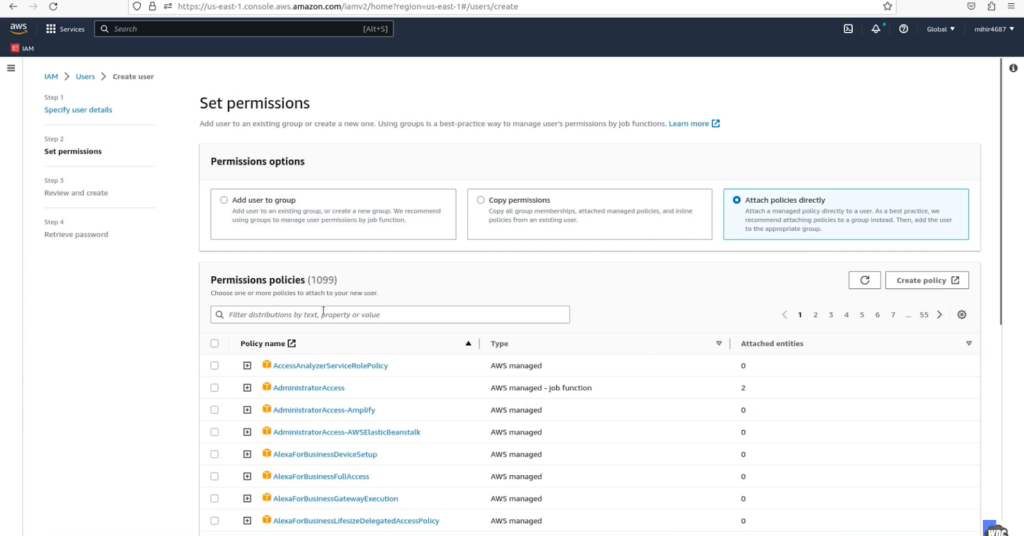
- Log in to the AWS Management Console;
- If you don’t already have API access keys, obtain them;
- Configure the AWS CLI with the obtained API access keys using the following command:
aws configure
Up to this point, you have successfully installed the AWS CLI, configured access, and now it’s time to verify its functionality. Begin by running the ‘aws s3 ls’ command to list your AWS S3 resources:
aws s3 ls
When everything is correctly configured, you should see the following output:
2016-07-25 16:11:06 xyz-project-freenas
2020-07-03 13:55:47 xyz-project-forum
….
..
Best Practices for Securing AWS CLI Credentials
It’s important to be aware that your AWS CLI credentials are stored in plain text within the ~/.aws/ directory. Consequently, it’s crucial not to share the ~/.aws/ directory and its associated files. You can view the credentials using the ‘cat’ command:
cat ~/.aws/credentials
To enhance security, there are options available. You can store your credentials in an encrypted format, or you can leverage AWS Multi-Factor Authentication (MFA). Enabling MFA is a best practice as it adds an additional layer of protection to your credentials. In an upcoming tutorial, we’ll explore combining these security measures using a wrapper script for even greater protection.
Locating the AWS CLI on Linux
To determine the location of the AWS CLI on your Linux machine, you can utilize various commands such as ‘find,’ ‘type,’ ‘whereis,’ or ‘which.’ Here’s an example using the ‘find’ command:
type aws

which aws

whereis aws

# this will take more time and may give many results #

sudo find / -type f -name "aws"
AWS CLI Configuration Examples
Below are examples of how to configure the AWS CLI:
aws configure wizardOutputs:
usage: aws [options] <command> <subcommand> [<subcommand> ...] [parameters]To see help text, you can run:
aws help

  aws <command> help

  aws <command> <subcommand> help

aws: error: argument subcommand: Invalid choice, valid choices are:

list                                     | get

set                                      | add-model
To view your current configuration settings:
aws configure list
Configure the AWS CLI using Single Sign-On (SSO):
aws configure sso

Check the caller identity for troubleshooting permissions:
aws sts get-caller-identityList AWS resources in a specific region and output in YAML format:
aws dynamodb list-tables --region us-east-1 --output yaml

aws lightsail get-load-balancer --load-balancer-name LS-EC2-LB1 --output table
Utilize auto-prompt for command assistance:
aws iam create-user --cli-auto-promptAccess an interactive wizard for an AWS resource:
aws dynamodb wizard <new_table>Generate a JSON CLI Skeleton useful for infrastructure as code:
aws dynamodb update-table --generate-cli-skeleton

{

    "AttributeDefinitions": [

        {

            "AttributeName": "",

            "AttributeType": "B"

        }

    ],

    "TableName": "",

    "ProvisionedThroughput": {

        "ReadCapacityUnits": 0,

        "WriteCapacityUnits": 0

    },

    "GlobalSecondaryIndexUpdates": [

        {

            "Update": {

                "IndexName": "",

                "ProvisionedThroughput": {

                    "ReadCapacityUnits": 0,

                    "WriteCapacityUnits": 0

                }

            },

            "Create": {

                "IndexName": "",

                "KeySchema": [

                    {

                        "AttributeName": "",

                        "KeyType": "HASH"

                    }

                ],

                "Projection": {

                    "ProjectionType": "KEYS_ONLY",

                    "NonKeyAttributes": [

                        ""

                    ]

                },

                "ProvisionedThroughput": {

                    "ReadCapacityUnits": 0,

                    "WriteCapacityUnits": 0

                }

            },

            "Delete": {

                "IndexName": ""

            }

        }

    ],

    "StreamSpecification": {

        "StreamEnabled": true,

        "StreamViewType": "OLD_IMAGE"

    }

}
You have now acquired the knowledge of installing the AWS CLI using various Linux package manager options. To access help text for AWS commands, you can simply run:
aws help

aws {command} {sub-command} help

aws s3 help

aws lightsail help

aws ec2 help

aws ec2 run-instances help

aws lightsail allocate-static-ip help